How to buy a business: a screen-by-screen walkthrough
A step-by-step tour of buying an online business on Online Asset, from browsing the marketplace to opening an inquiry, entering the deal room, reviewing the data room, messaging your advisor, and making an offer.
Key takeaways
- The public marketplace shows teasers only (category, a short headline, and a price band, never the exact price, revenue, or domain); the confidential dossier unlocks inside the deal room after you are verified, sign the deal-specific NDA, and get an access grant.
- Every deal moves through the same 10 stages (Inquiry, NDA, Access granted, Due diligence, Offer, LOI, Escrow, SPA, Transfer, Closed), and your deal room shows exactly where you are and whose turn it is.
- A named advisor accompanies you the whole way and can act alongside you in assist mode; message them or request a call right from the deal room, while you still approve the big decisions.
- You make offers directly in the deal room's Actions panel, then track every deal and its stage under My Deals.
- Escrow funding and signing are advisor-coordinated off-platform for now (in-app escrow and e-signature arrive in Phase 2), with the same safeguard: funds are secured before any transfer.
Buying an online business on Online Asset follows one clear path: browse listings, open a teaser, enter the deal room to unlock the confidential details, review the documents, talk to your advisor, and make an offer. A named advisor accompanies you at every step and can act alongside you in assist mode, but you still approve the big decisions.
This walkthrough uses the real screens you will see. Follow along in order, and by the end you will know exactly where to click for each part of the journey.
Step 1: Browse the marketplace
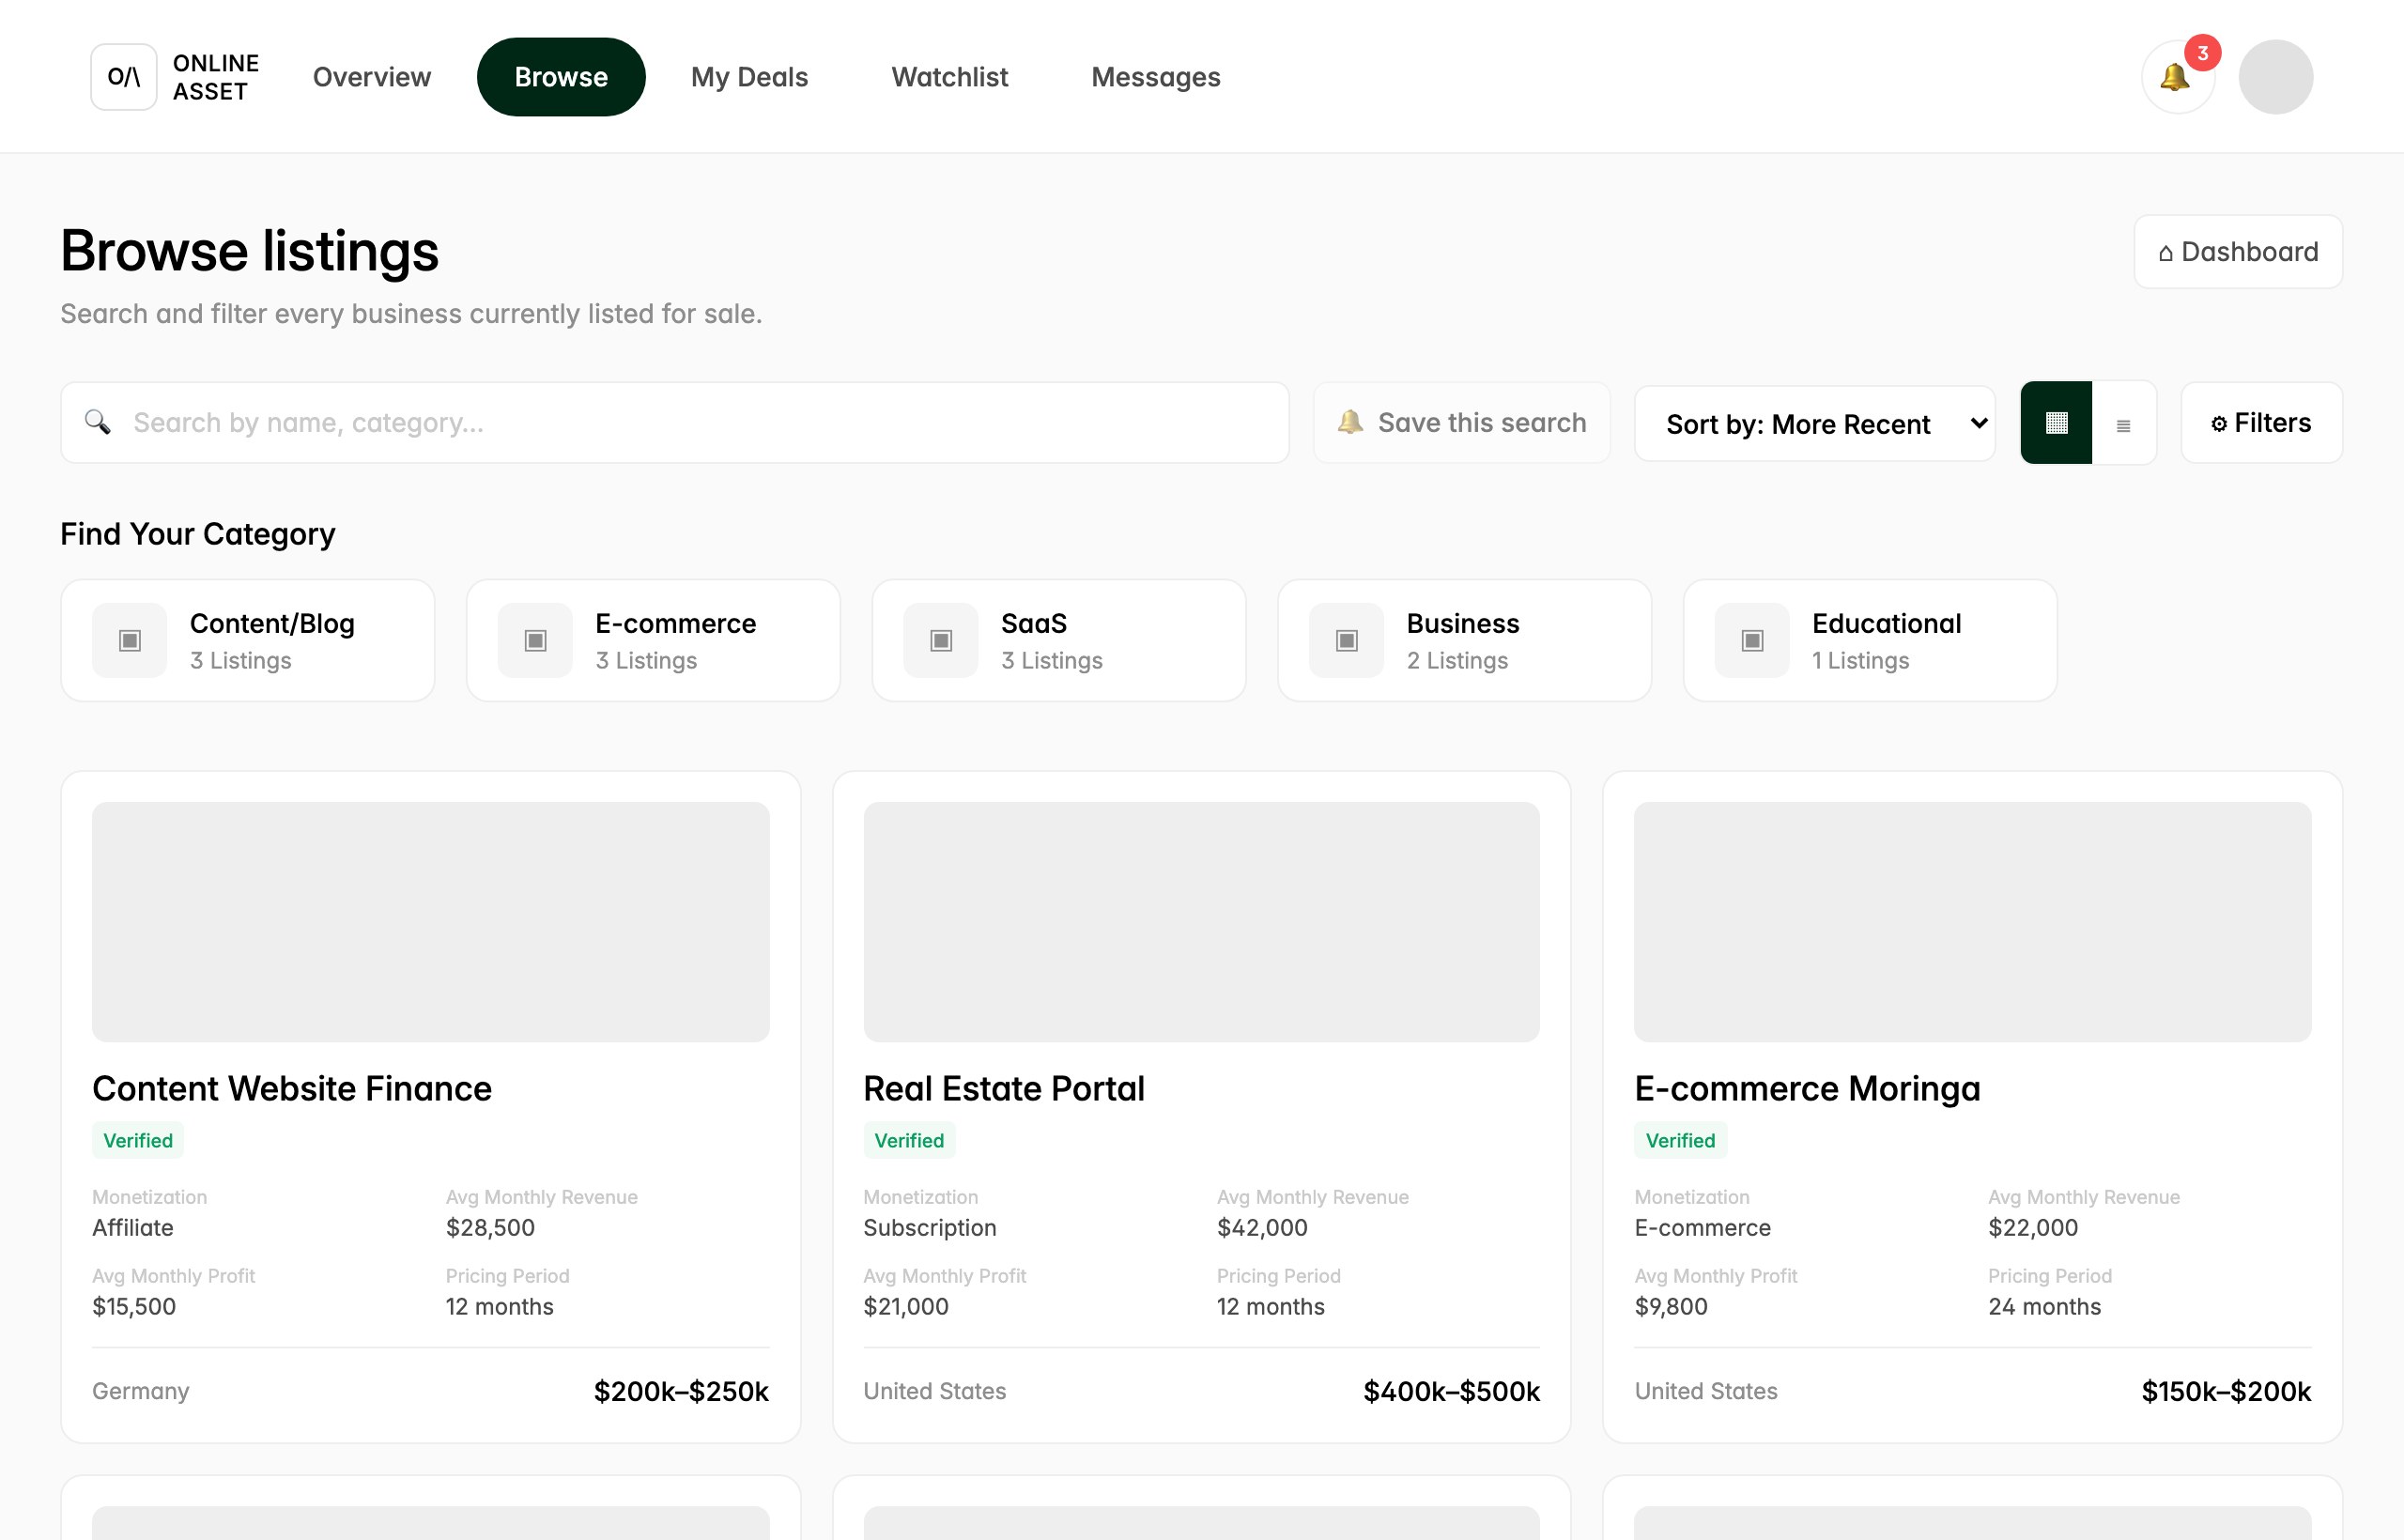
Start on the Browse tab. This is the public marketplace, where every business currently listed for sale appears as a card. Use the search bar at the top to look up a name or category, or narrow things down with the category chips (Content/Blog, E-commerce, SaaS, Business, Educational) and the Filters button on the right. You can also sort the results (for example by More Recent) or save the search to get notified of new matches.
Each card is a teaser: it shows the listing headline, its category, a monetization type, a country, and a price band (for example $200k to $250k), never the exact price, revenue, or domain. A green Verified badge tells you the seller has confirmed their identity and business ownership. Click any card to open its full listing.
Step 2: Open a listing teaser
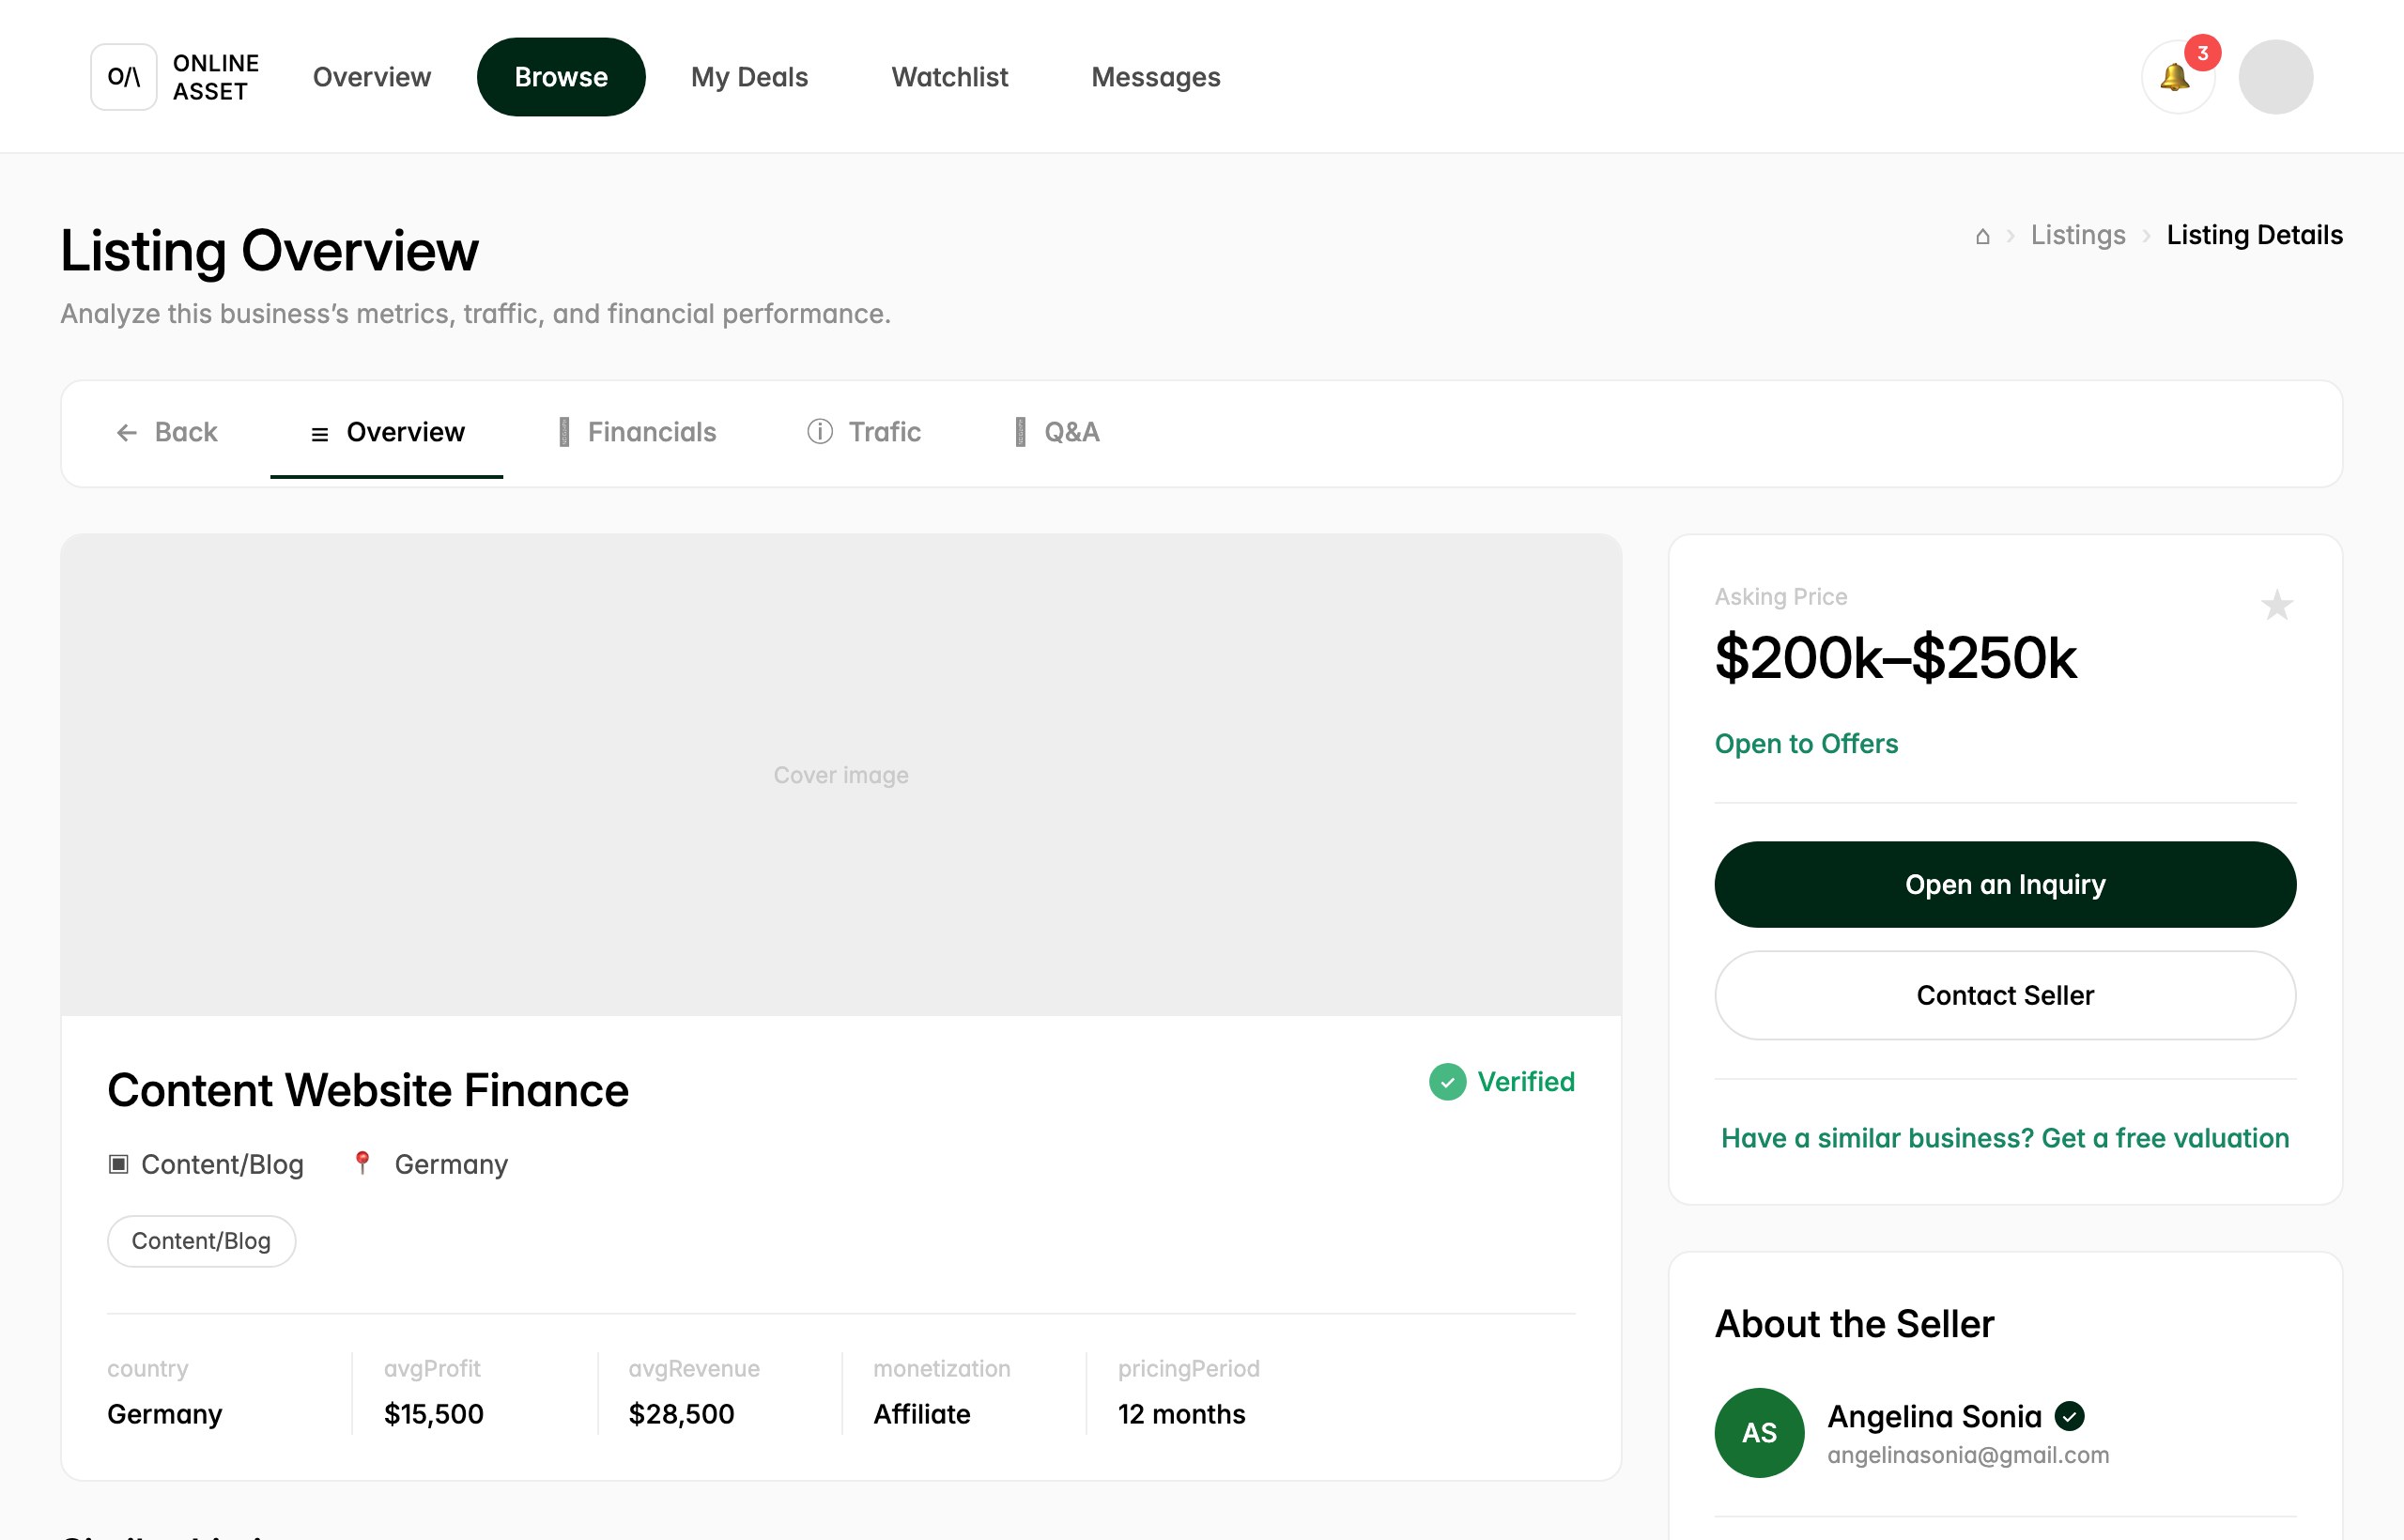
The Listing Overview page gives you the fuller public teaser for one business. Use the tabs (Overview, Financials, Traffic, Q&A) to explore what the seller has chosen to show, and read the right-hand panel where the Asking Price band and an Open to Offers note sit. Below that you will see who the seller is under About the Seller.
When you are ready to go further, click Open an Inquiry. This is how you signal interest and begin the process that leads to signing an NDA and unlocking the confidential dossier. Contact Seller lets you ask a question first, and the star icon saves the listing to your watchlist for later.
Step 3: Enter the deal room and sign the NDA
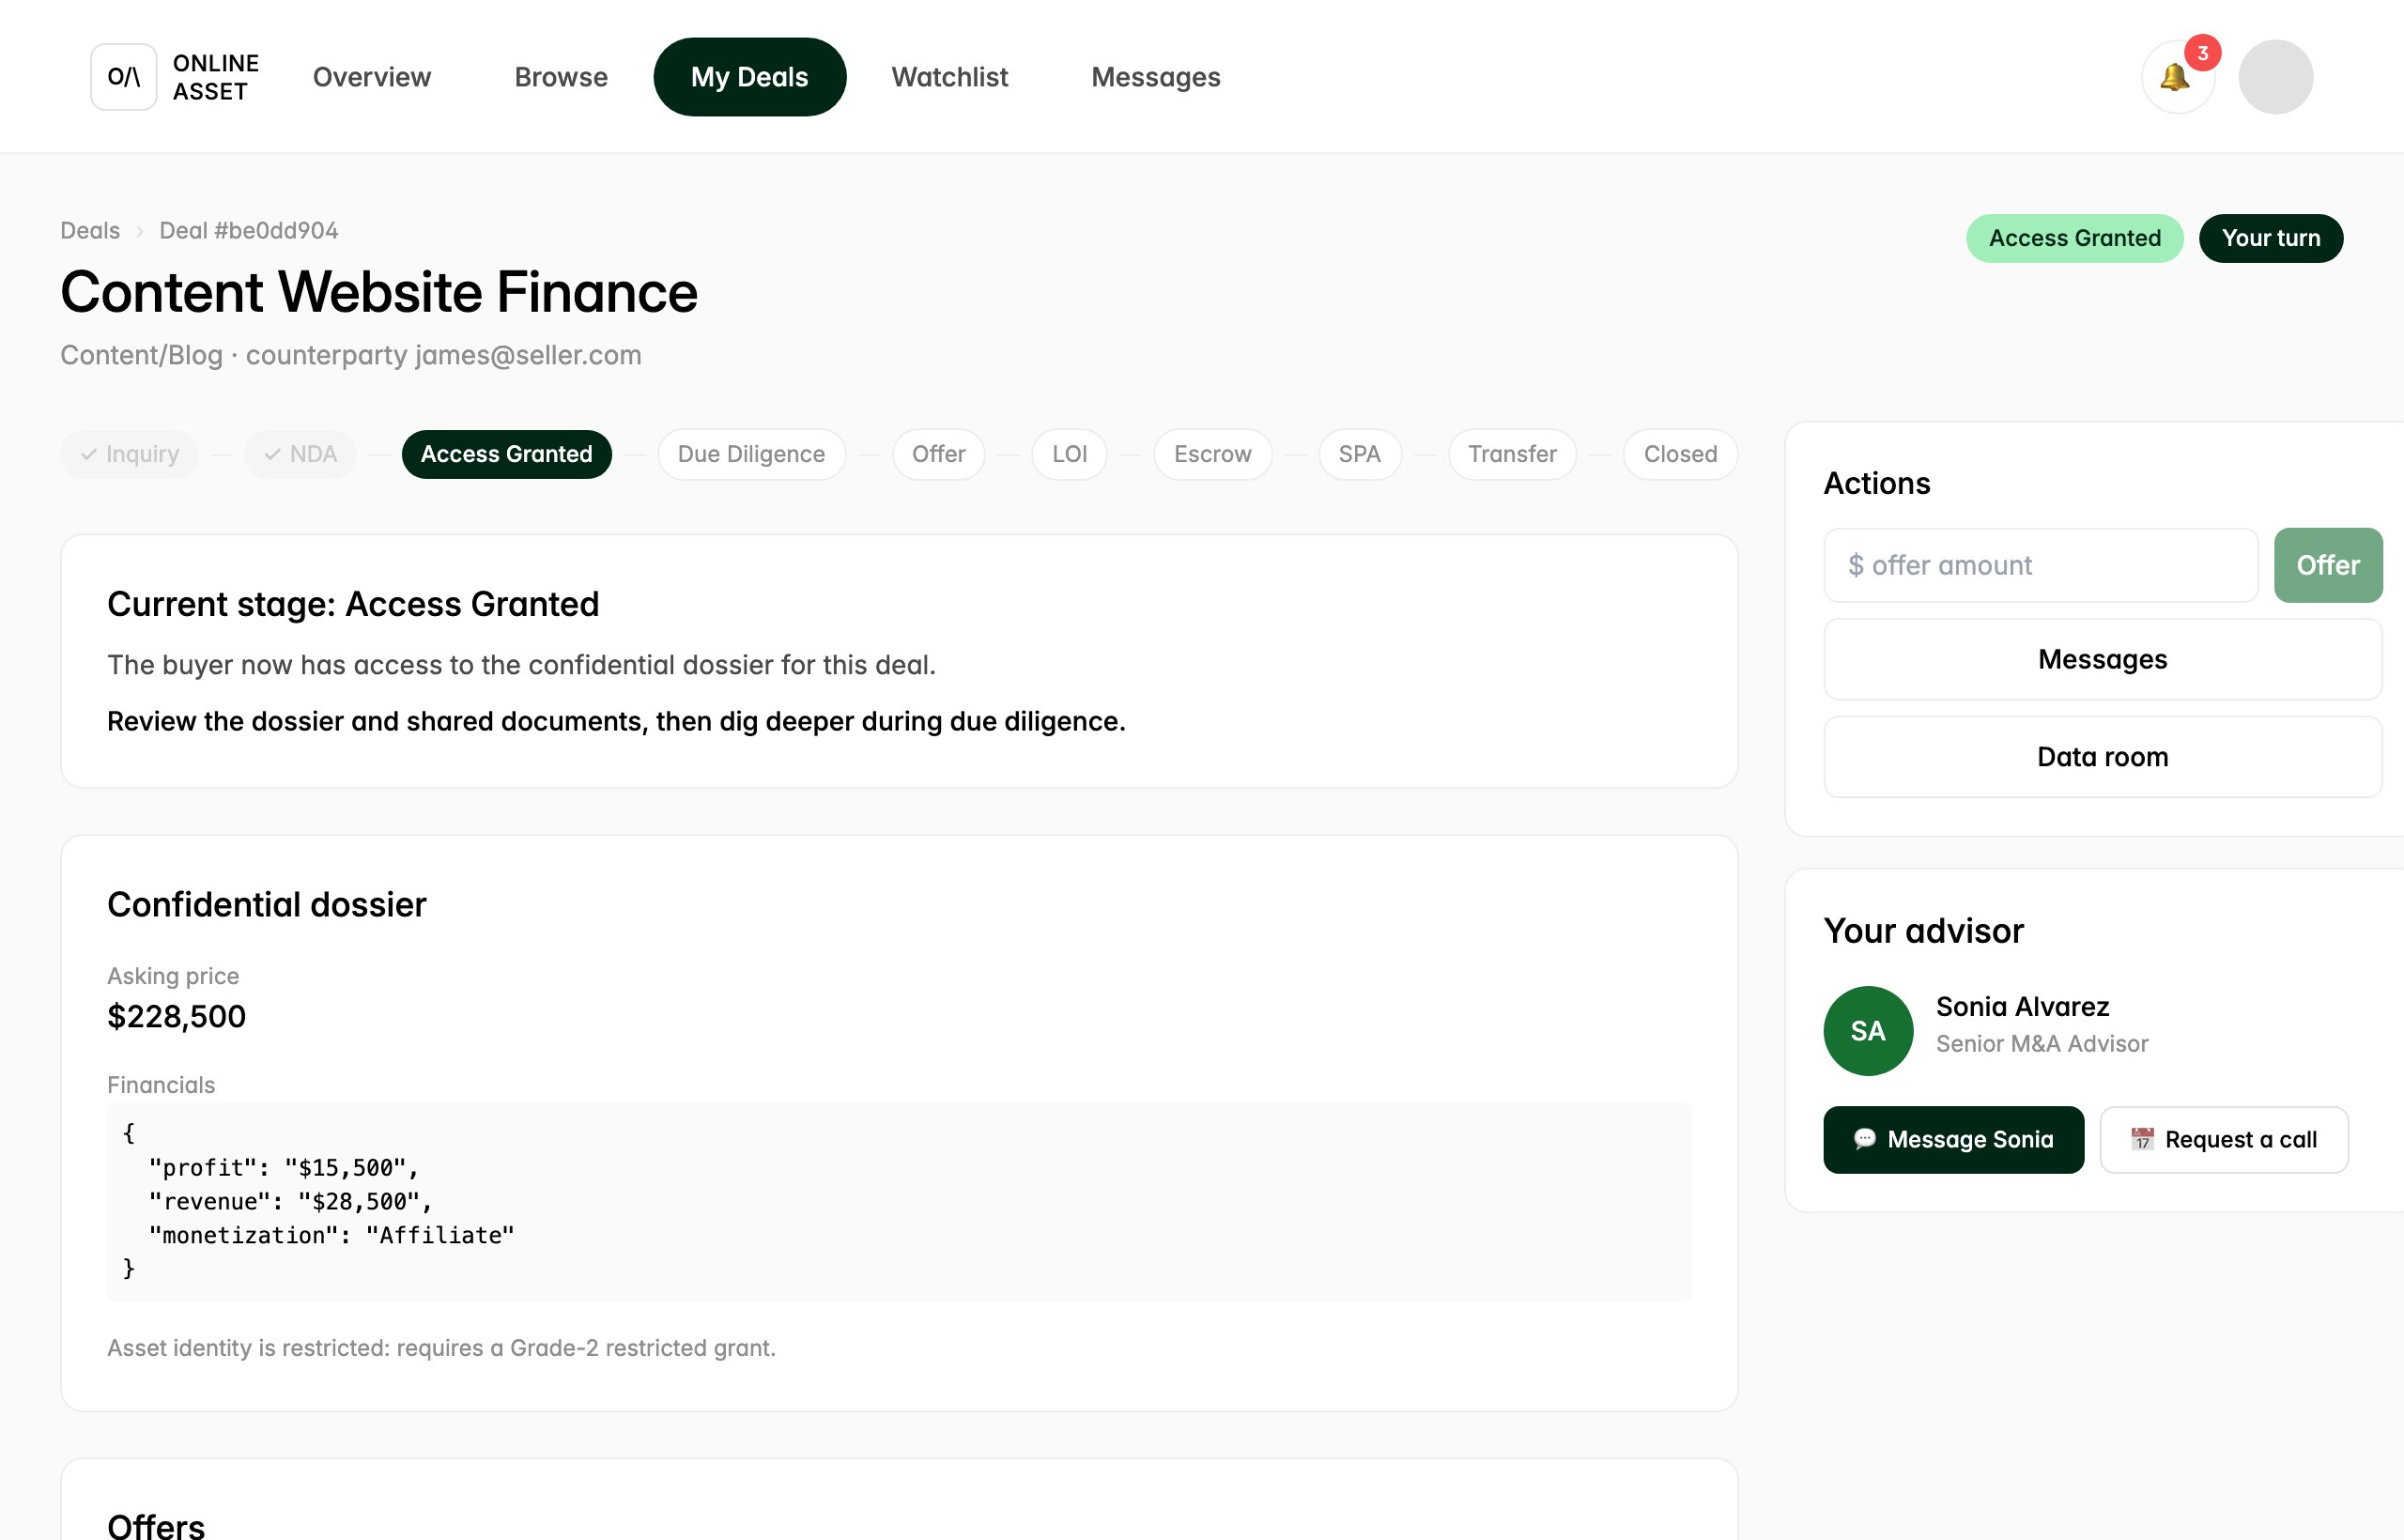
Once your inquiry is open, the business becomes a deal you manage in the deal room. Across the top runs the 10-stage tracker: Inquiry, NDA, Access Granted, Due Diligence, Offer, LOI, Escrow, SPA, Transfer, and Closed. The highlighted pill shows your current stage, and the Your turn badge tells you when an action is waiting on you. Signing the deal-specific NDA is what moves you toward Access Granted, and getting that access grant (once you are verified) is what reveals the confidential dossier.
With access granted, the Confidential dossier now shows the exact asking price (here $228,500) and the financials that the public teaser kept hidden. On the right, the Actions panel is where you enter a dollar figure in the offer amount box and submit an offer, open Messages, or jump to the Data room. The Your advisor card names the advisor accompanying you (here Sonia Alvarez, Senior M&A Advisor), with buttons to message them or request a call. Note that some details stay restricted until a higher-grade access grant; the dossier flags this, for example that asset identity requires a Grade-2 restricted grant.
Step 4: Review the data room
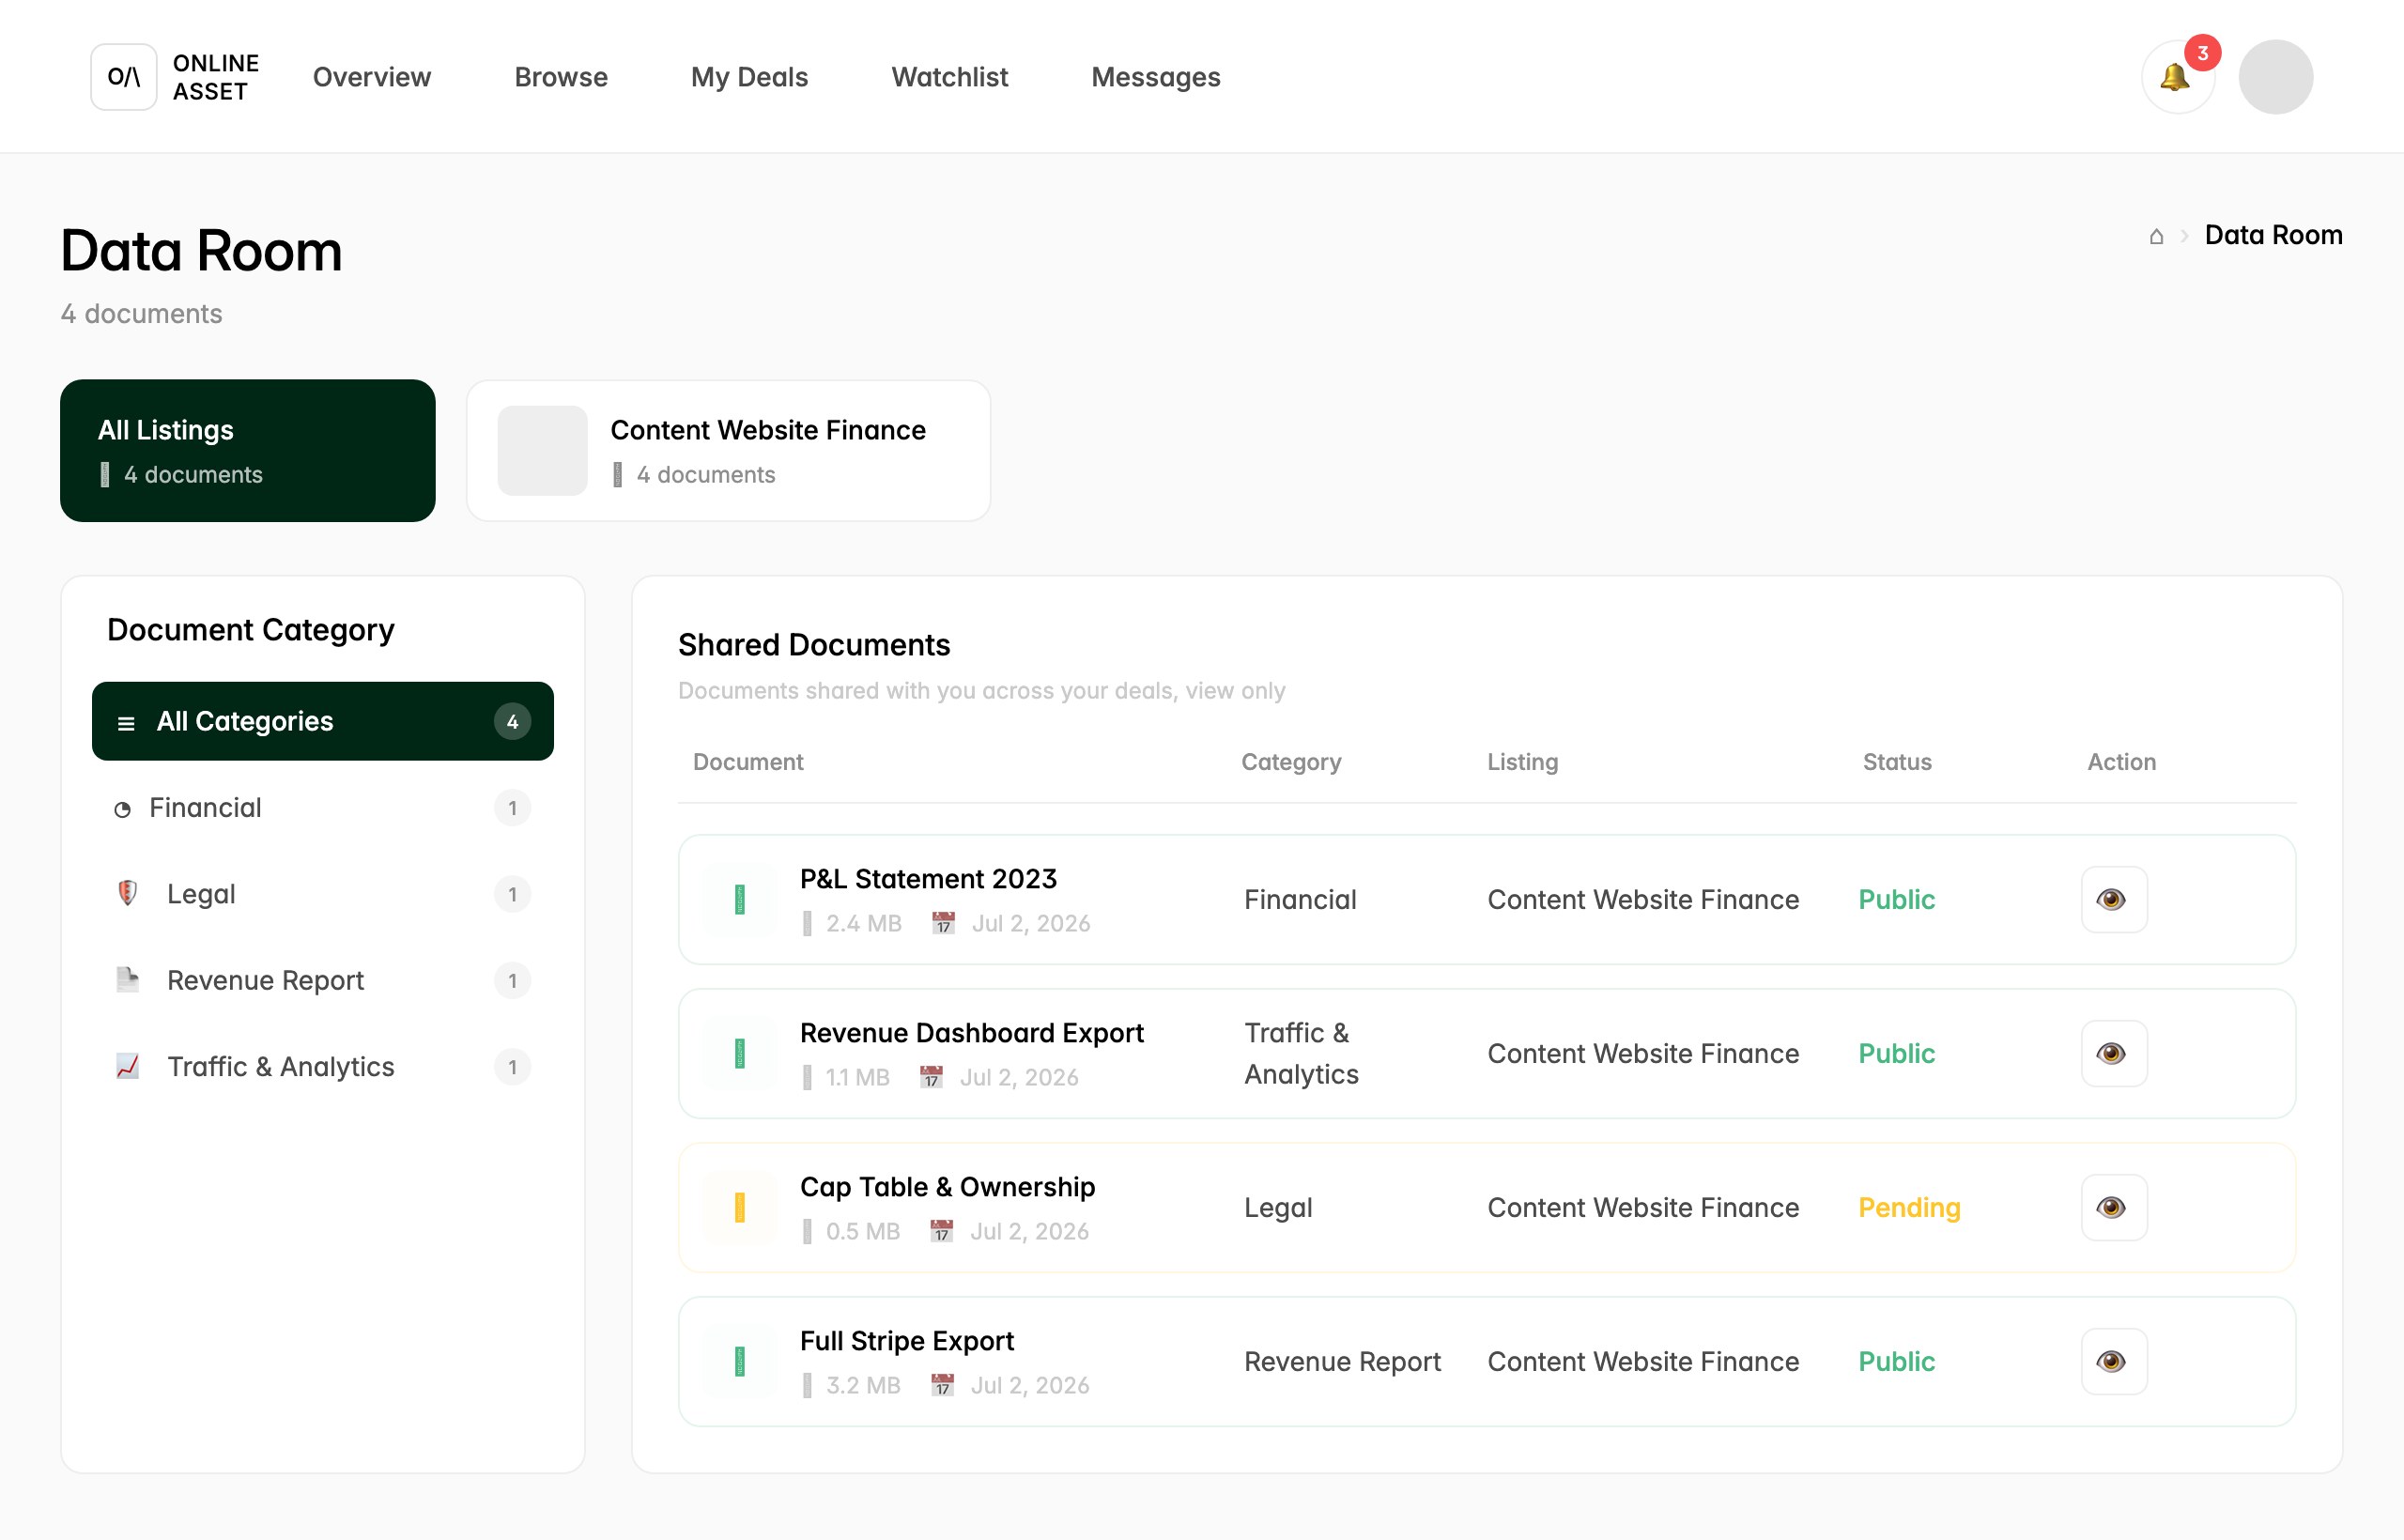
Click Data room to open the per-deal document library. Documents are grouped by category on the left (Financial, Legal, Revenue Report, Traffic & Analytics), and the main list shows each file with its category, the listing it belongs to, and a status. This is where you dig into the real evidence during due diligence: profit and loss statements, revenue exports, cap table, and more.
The Status column matters. Public documents are ready to view now, while a Pending item is not yet released to you. Use the eye icon in the Action column to open any document you have access to. These files are view only and shared specifically for your deal.
Step 5: Message your advisor
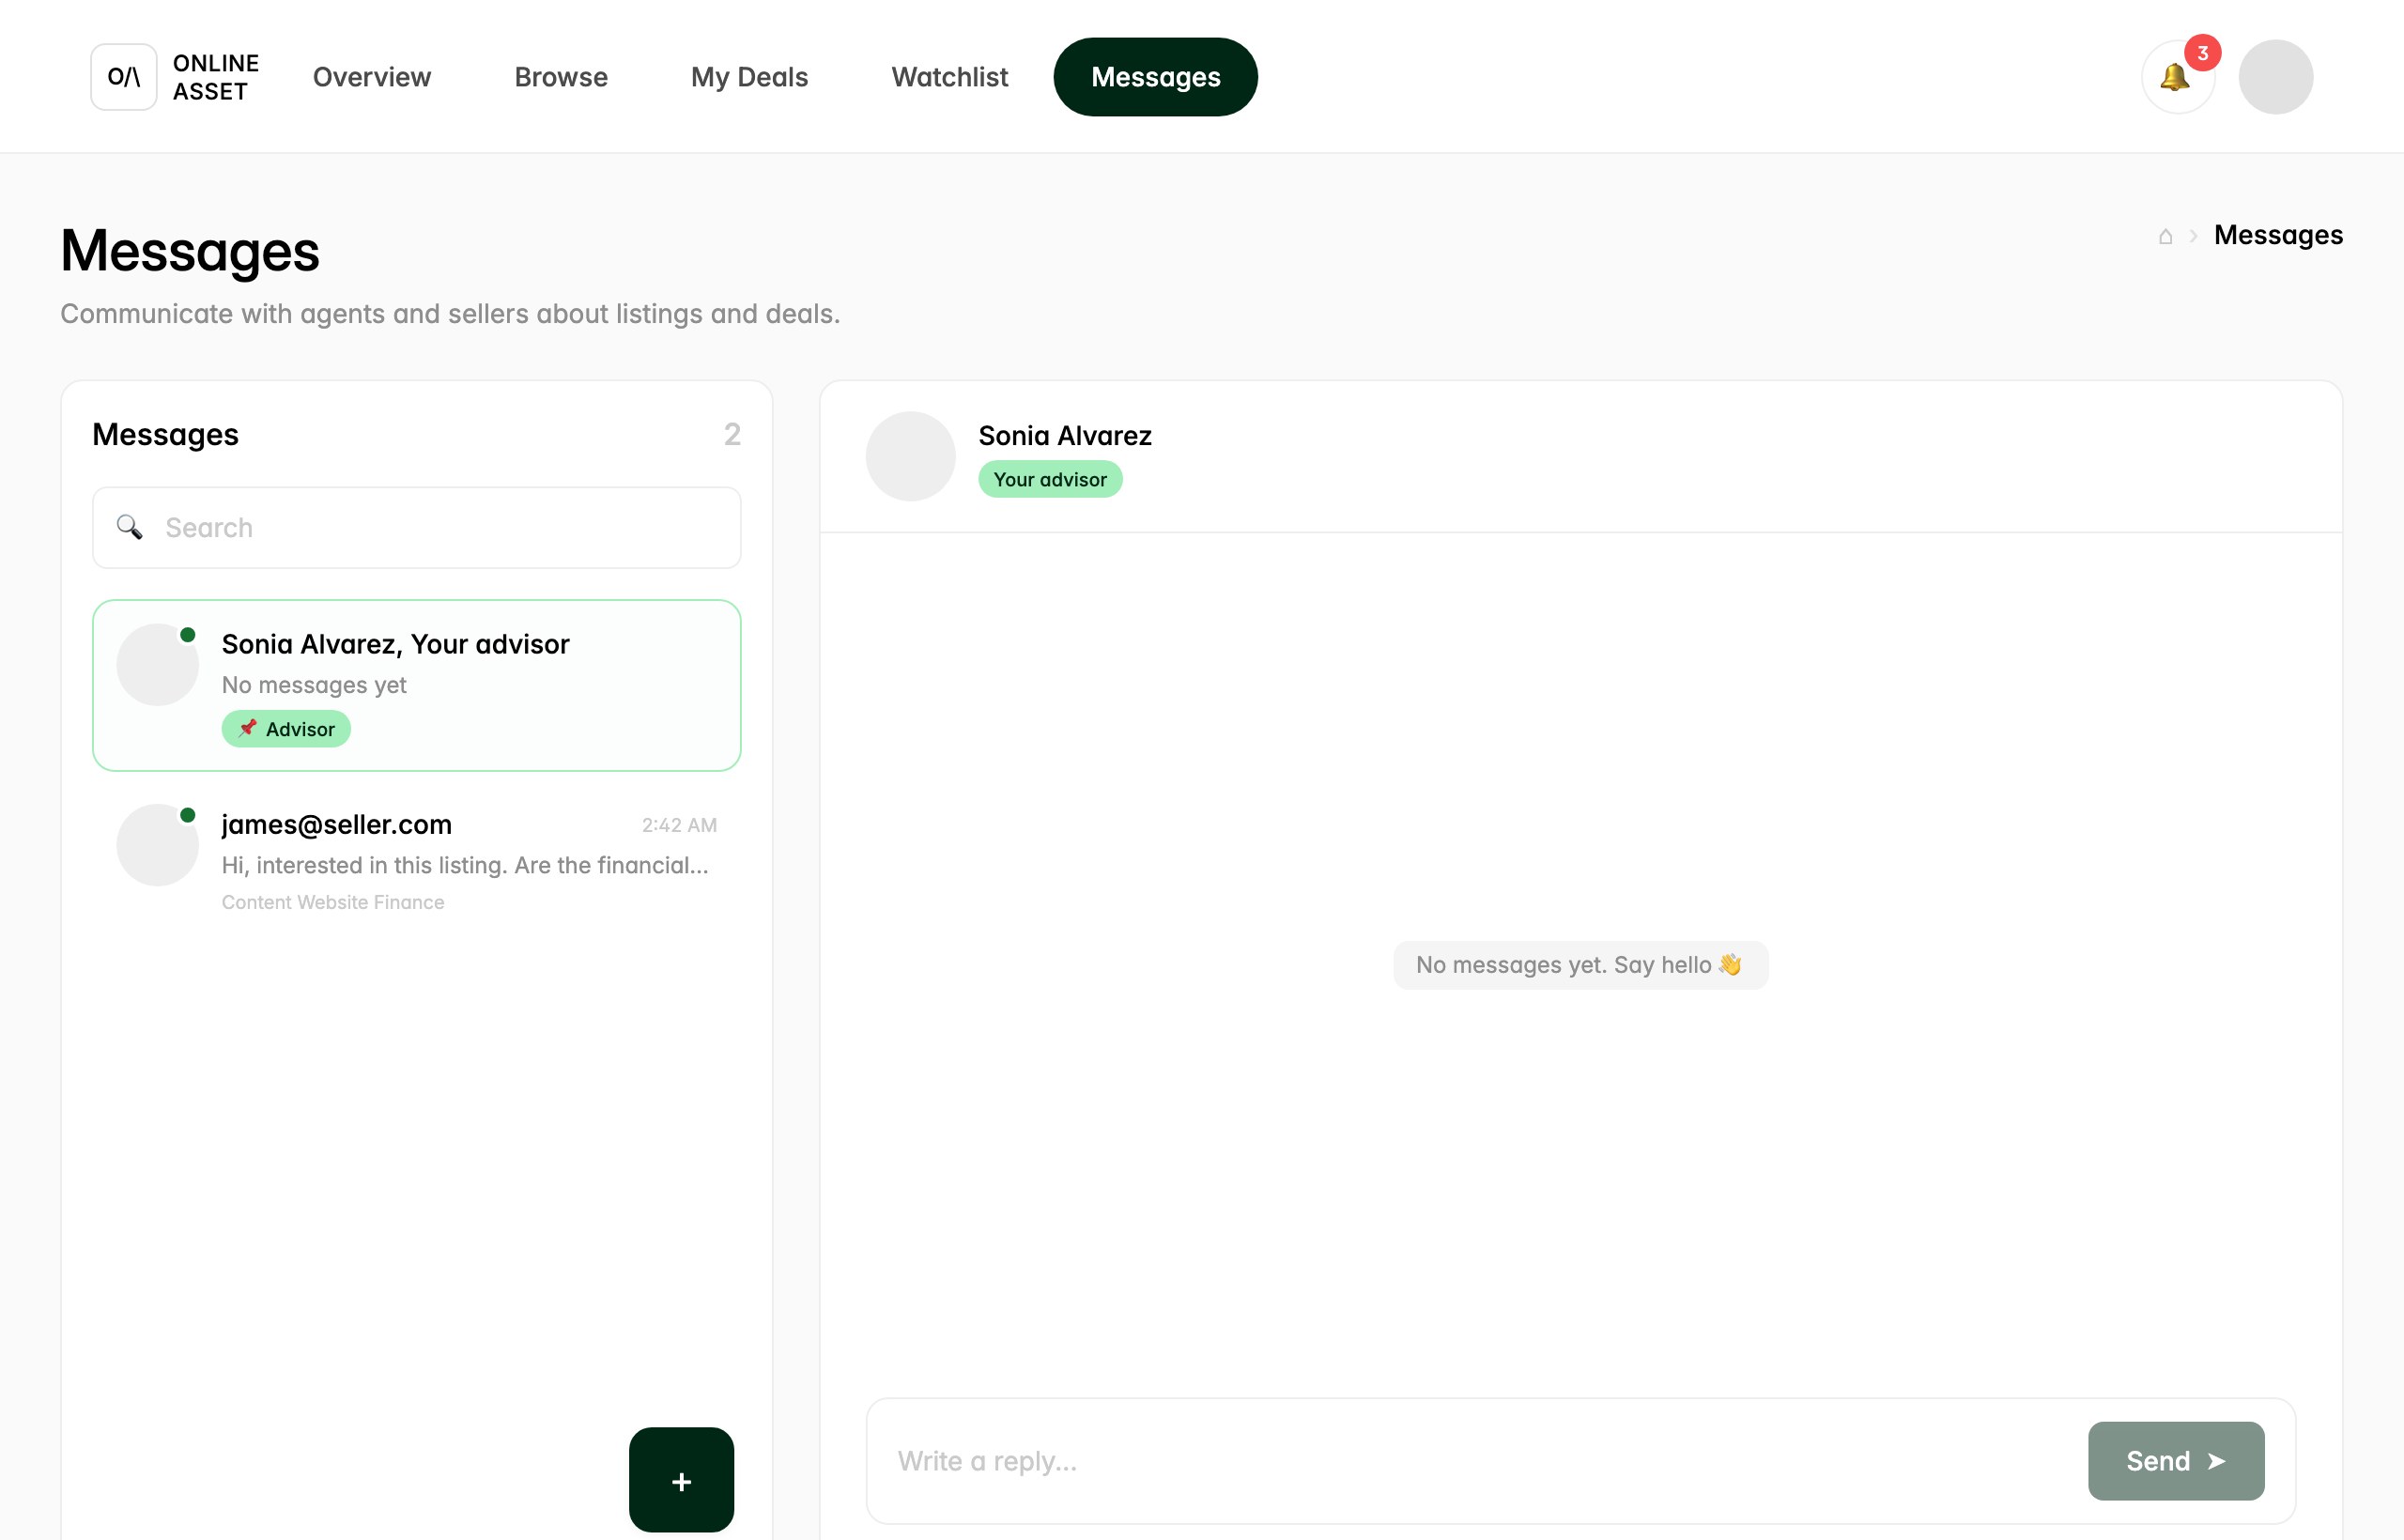
Open Messages to talk things through. The left panel lists your conversations, including your advisor (pinned with an Advisor tag) and the seller. Select your advisor to open the thread on the right, type in the Write a reply box at the bottom, and click Send. This is the fastest way to ask what a document means, sanity-check a number, or get help framing an offer.
Your advisor accompanies the whole deal and can act with you in assist mode, so use this thread freely. Sometimes two advisors work one deal (a specialist plus a supervisor), and you will simply see them as your advisors. From the deal room you can also request a call if you would rather talk it out.
Step 6: Make an offer and track your deals
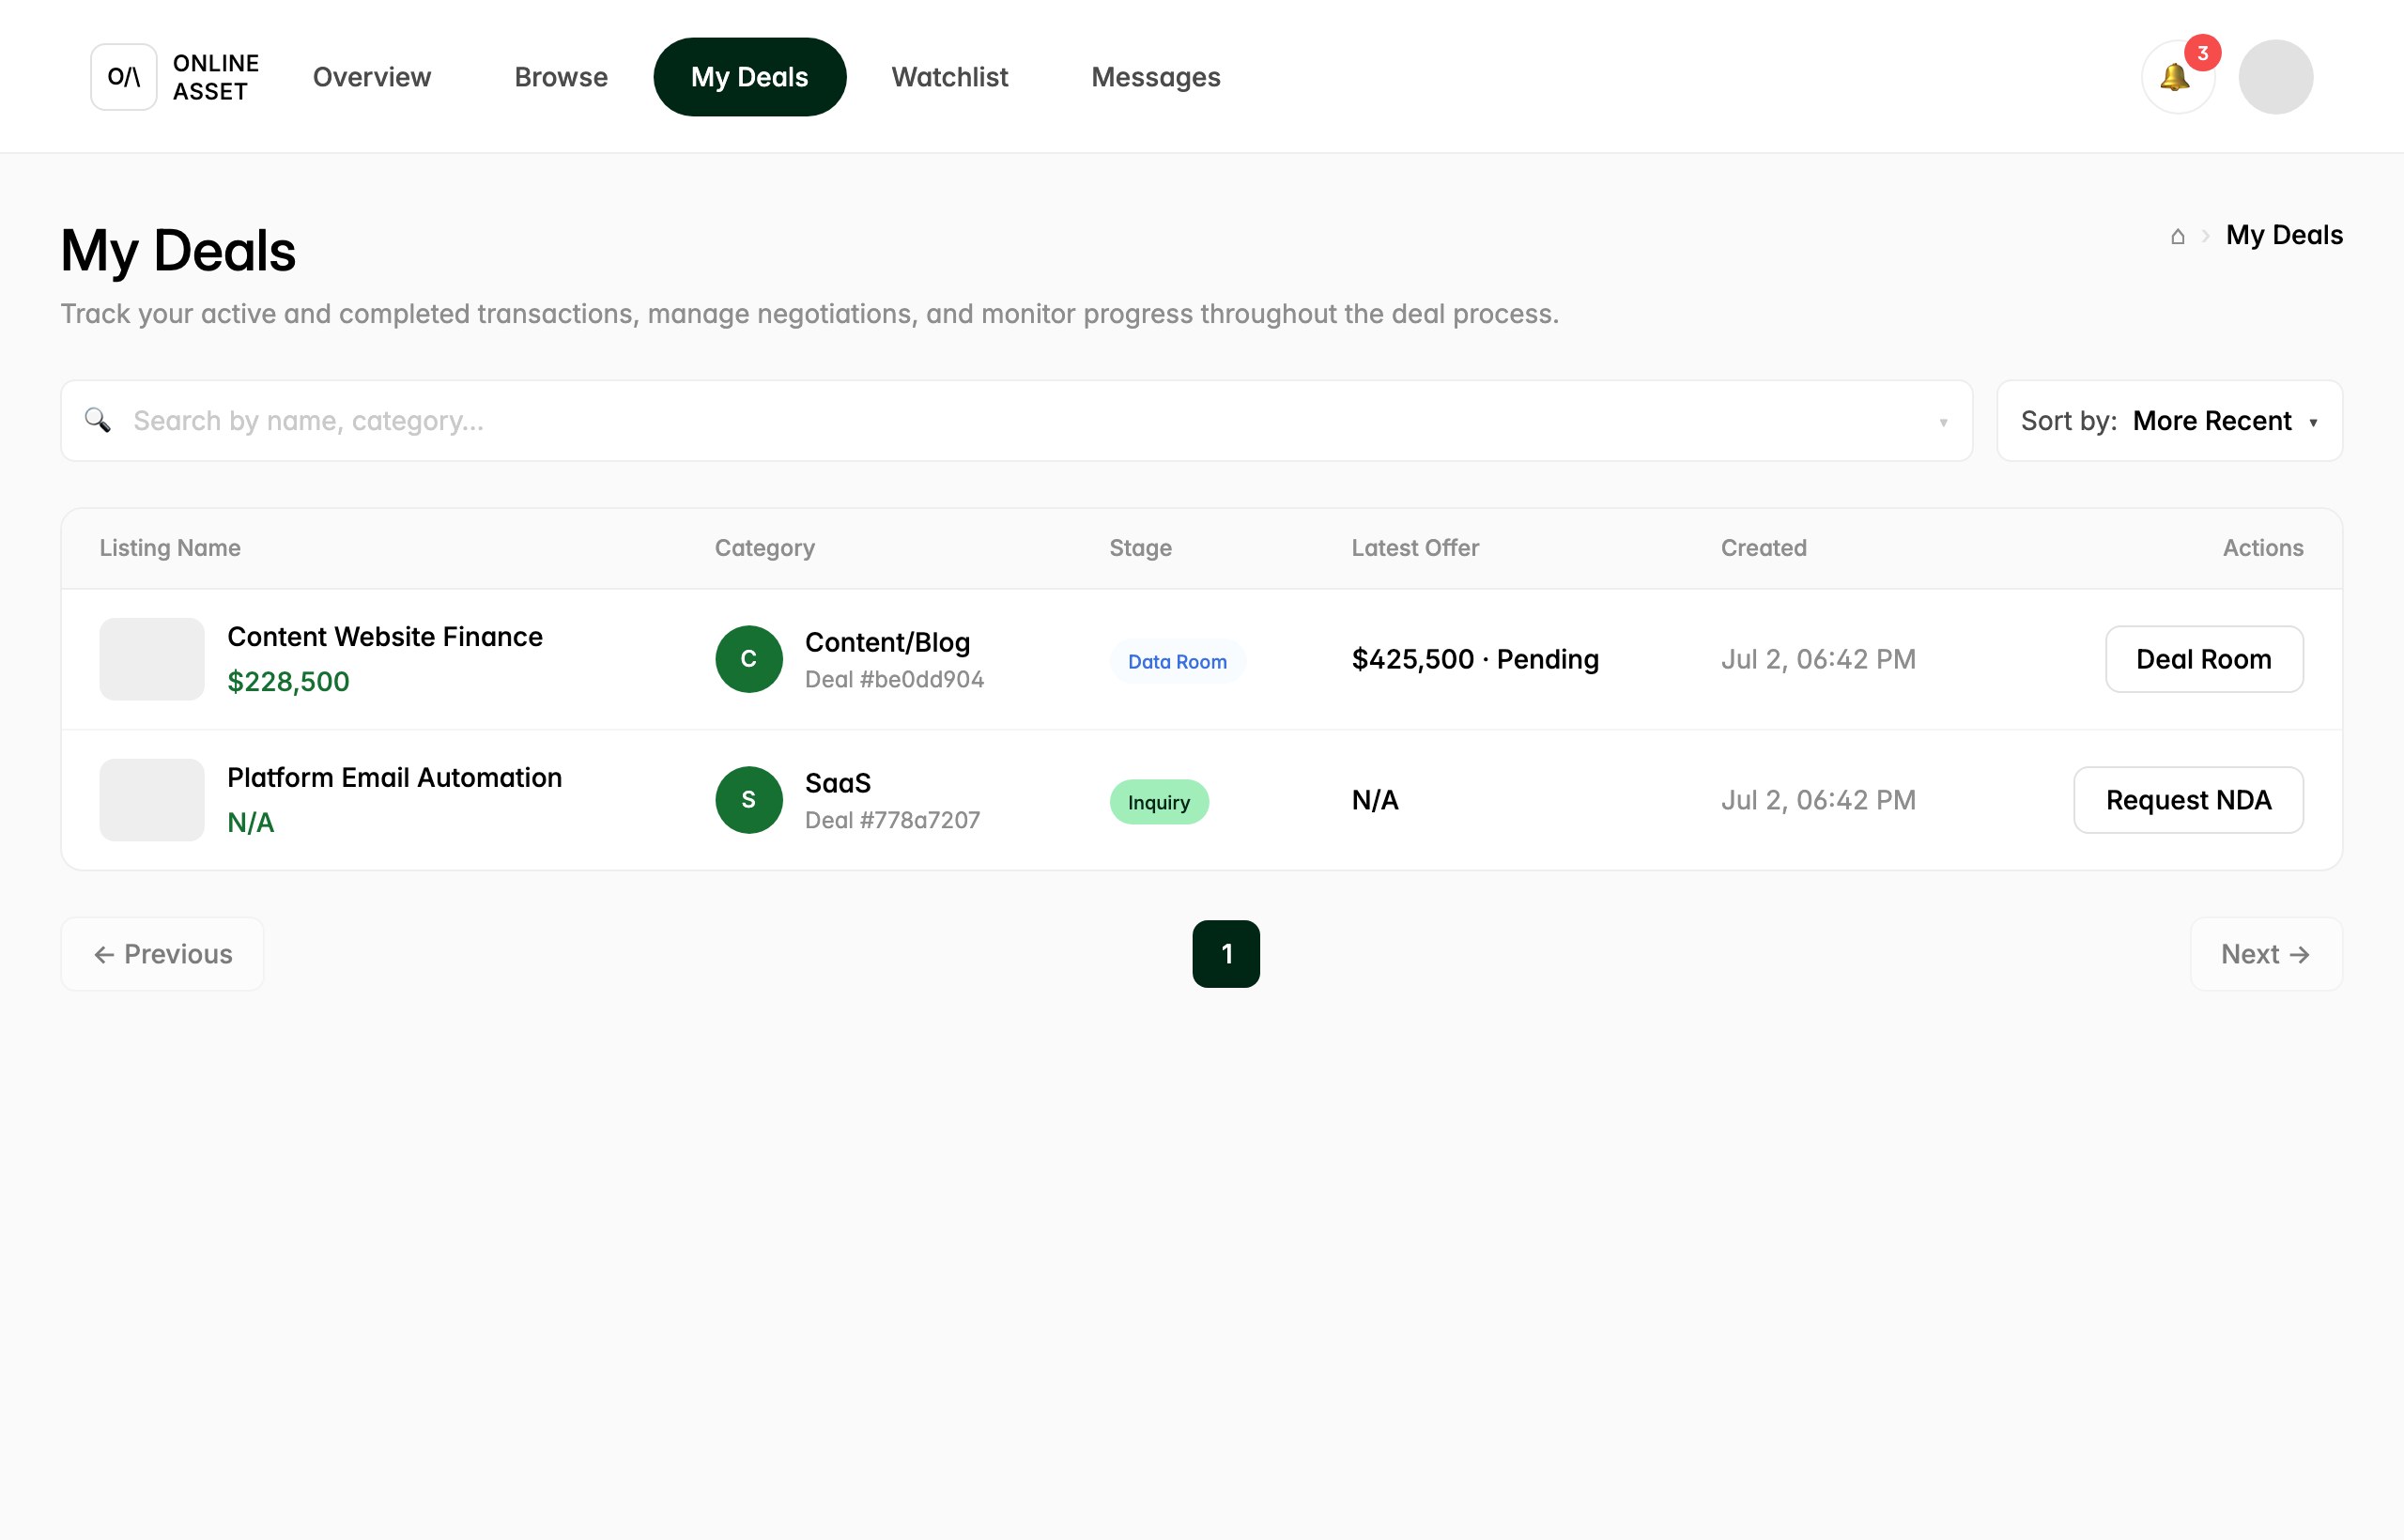
You submit offers from the deal room's Actions panel by entering a dollar amount and clicking Offer. Offers are bidirectional: the other side can accept, counter, or decline, and an accepted offer advances the deal to the LOI stage. To see everything in one place, open My Deals.
My Deals lists each active transaction with its category, current Stage, your latest offer and its status (for example $425,500 Pending), and when it was created. The Actions column gives you a quick way back in: Deal Room for a deal that is underway, or Request NDA for one still at the Inquiry stage. One honest note: escrow funding and signing are coordinated by your advisor off-platform for now, with in-app escrow and e-signature arriving in a later phase (Phase 2). The safeguard is unchanged: funds are secured before any transfer, and your advisor keeps the deal room updated throughout.
That is the full journey: browse, open a teaser, open an inquiry and sign the NDA to enter the deal room, review the data room, lean on your advisor, and make your offer. Take each stage at your own pace, and remember your advisor is one message away at every step.
Try it yourself.
Follow the steps in the real product. A named advisor is assigned the moment you start.